
Conference: the host's view
You speak into a microphone, listeners join by link and pick their own language. One speaker, many languages.
Create a room All plans
A room is your online meeting. Open Rooms and start from a preset - it is just a starting setup: every room has the full feature set, and the preset can be changed inside the room at any time.
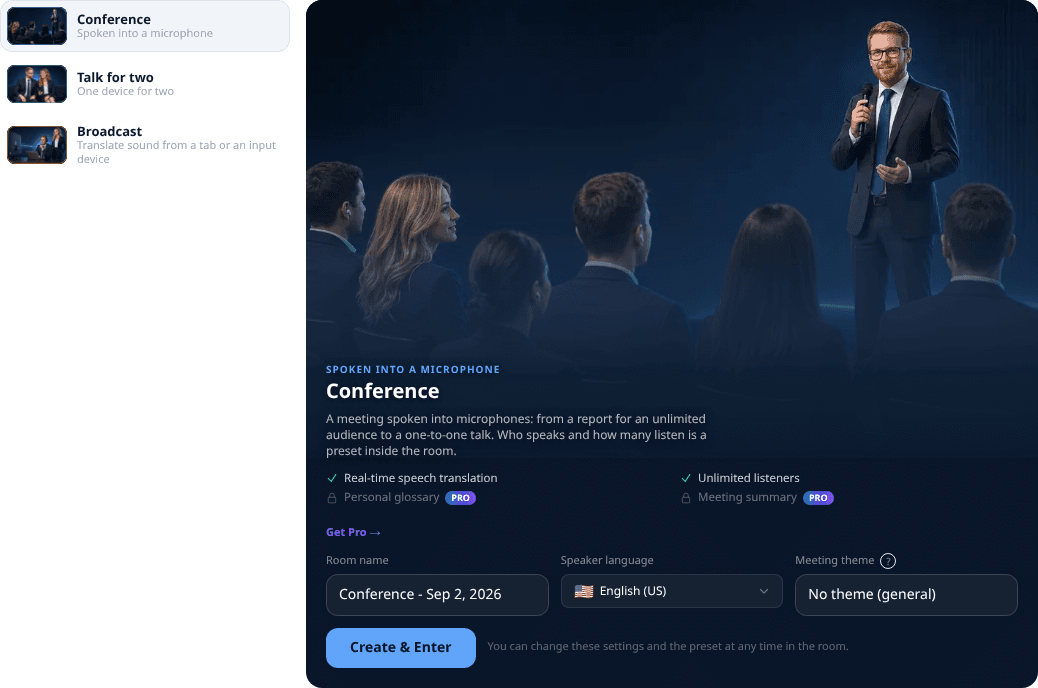
- 1Room name - filled in automatically, change it if you like.
- 2Speaker language - the language YOU will speak. Defaults to the site language.
- 3Meeting theme - tell the translator the setting (business meeting, church service, doctor visit) for better accuracy. It is a separate setting: no preset imposes it, and you can leave No theme.
- 4Press Create and enter - and you are inside the room. Everything else is changed later in room settings.
Presets inside the room All plans
A preset is not a room type. The type decides where the sound comes from and is chosen before creating the room; a preset only rearranges settings inside a conference and can be switched at any moment.
Presets exist only for the Conference. Broadcast and Talk for two have none - and that is not an omission: the first is defined by its sound source, the second has a single scenario. A preset does not change the room type, it only rearranges its settings.
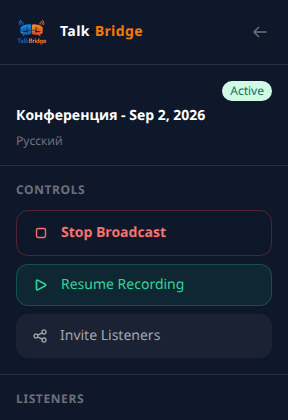
- 1A meeting spoken into microphones: from a report for an unlimited audience to a one-to-one talk. Who speaks and how many listen is a preset inside the room.
- 2Both sides speak: any participant talks in their own language, the others hear their own.
- 3A private conversation with one other person, each on their own device: only one listener joins, both sides speak with instant translation.
Inside the room All plans
The control panel is on the left, the big board where your speech appears is on the right. Let us go over every button.
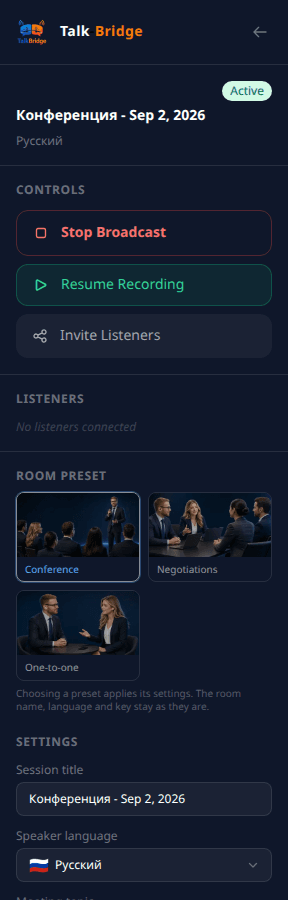
- 1Room preset - switch the scenario in one click: the settings of the chosen preset are applied, while the room name, language and key stay as they are. If you change a setting by hand, the room is marked Custom setup.
- 2Session name - rename the meeting at any moment.
- 3Speaker language - change it here if you switch languages.
- 4Meeting topic - describe in words what the meeting is about: it helps translate more precisely.
- 5Meeting topic - the same setting choice as at creation.
- 6Allow listeners to speak - turn it on so listeners can ask questions with their voice. Available in any room, whatever preset it was created from.
- 7Listener limit - 0 means no limit; set 1 to keep the room private for two. Beyond the limit new listeners see «the room is busy».
- 8Smart translation - a helper that follows the meaning of the conversation and fixes mishearings. On by default - better keep it on.
- 9Force context - a technical switch for testing smart translation without listeners. Regular users do not need it.
Room controls All plans
The same buttons live both in the left panel and above the board - so they are within reach wherever you are looking.
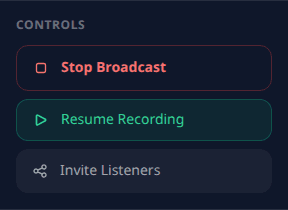
- 1«Start broadcasting» - the room starts listening and translating. Until you press it, listeners see a waiting screen.
- 2«Pause» - translation stops, the room and the link stay alive. Handy during a break: listeners do not need to re-enter.
- 3«Invite listeners» - the link and the QR code to join.
- 4On the right above the board: mute the voice-over of listeners' phrases, and show translations next to the original speech.

Tony: start without a subscription. Rooms, translation and listeners work right away; Pro helps when meetings become regular and you want to come back to them.
The big board: what the labels mean All plans
The board on the right is information only - no need to click it. Here is what the labels mean before the start:
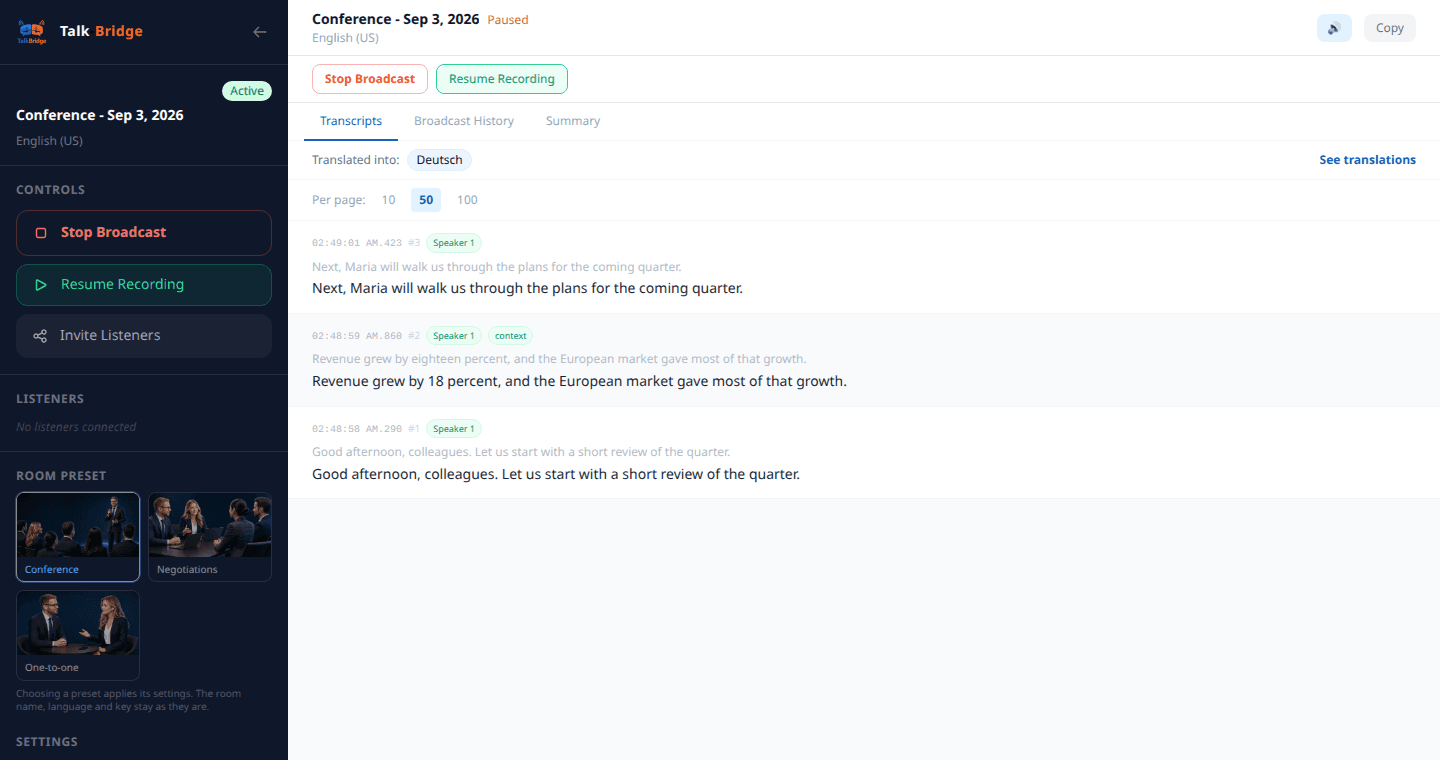
What the feed shows
The grey line is what the recogniser heard, word for word. It shows how the speech actually sounded: with slips, broken phrases and unfamiliar names.
The dark line beneath is the same phrase after smart processing: the service keeps the meeting topic and previous lines in mind, so it repairs names, terms and broken bits. It is this line that goes into translation - and the one worth looking at.
Translations are not shown in the speaker's feed - it holds only your own speech so it reads large. Above the feed runs the «Translated into» line with the languages listeners have picked right now, and next to it the «See translations» button: it opens the «History» tab, where translations are laid out in columns, one per language.
- 1Ready to start - the room is created, all good, the service is waiting for you.
- 2Press Start in the side panel - a hint: the start button is Start broadcast on the left.
- 3Your speech will appear here - after the start your phrases and their translation run on the board.
- 40 segments, 0 words at the bottom - counters of what was said. They grow as you speak.

Sofia: if names and terms still come out wrong in the dark line, add them to the glossary and pick a meeting topic. The smart processing leans on those rather than guessing.

Tabs above the board: Transcripts - the text of the current meeting; Broadcast history - records of past ones (available with the Pro subscription).
Invite listeners All plans
Listeners do NOT need to register or pay - they just open your link. Press Invite listeners:
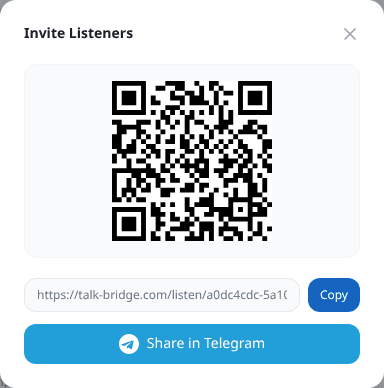
- 1Show the QR code from your screen - a listener points the phone camera and lands in the room.
- 2Or press Copy and send the link any way you like.
- 3A listener needs no account - they join by link and pay nothing. But right on the entry screen they can create one: then they get their own rooms, saved links and history. It is an offer, not a condition.